SnagIt captures IMAGES / TEXT / VIDEOS from your screen.

--- All-in-One Capture helps you to decide what to capture by automatically selecting screen regions, windows, tool bars, suggesting strolling regions and more while also giving you the ability to select a custom regions if the automatic ones don't work out.
--- All-in-One locks on to important parts of your screen while fading out the rest. This helps you see what your capture might look like by clearly indicating whatareas you are about to capture.
--- Let's look at how to use it.
--- All-in-One is a capture type. Under "Profiles", select whether you want to capture an image, video or text.
--- Under "Profile Settings", select the All-in-One option.
--- In the lower right hand side, click the large red capture button.
--- All-in-One identifies windows and tool bars automatically. When you hover your curser over a scrolling window, pause briefly to see an orange scrolling indicator. If you click on one, SnagIt will scroll in that direction capturing everything contained in that window.
--- Now you can annotate the entire area instead of having to piece together several captures to get the whole picture.
--- With All-in-One selected, you can also select a custom area if you need more than just the window or toolbar. For example, if you want a smaller window with some desk top capture as well to offer context. Click and drag your capture area. Note that the dimentions are clearly displayed as you move your mouse. Release the mouse button when you're ready to capture.
--- The SnagIt editor opens and displays your capture. Now you're ready to edit.
--- Due to it's flexibility, you may find the All-in-One capture mode is the only capture mode you need.

--- What to capture images or video quickly?
--- OneClick is a small functional shortcut screen that gives you quick access to capture features you may need. You can drag and drop this shortcut to any portion of your display screen that best meets your needs. It stays out of your way but, ready for use in an instant.
--- When you're ready to capture, hover over the shortcut to bring it out of hiding.
--- Next, select the capture mode you want. You can select image, video, or any other profile you have in SnagIt. Select the one you want.
--- Click the red capture button and you're ready to capture.
--- Simply click, drag and done. Your image displays in the editor ready to be edited, saved or shared.
--- You can access the editor anytime you need it by clicking the shortcut.
--- Like the classic editor display? Access the shortcut and click the image in the center of the bottom portion.
--- You can turn OneClick on or off from the classic editor view.
--- Even if you don't want to turn off OneClick, you can use the classic display to create custom profiles.

Capture Profiles are formatting templates you can use over and over again. As a convenience, some profiles are designed and preloaded in SnagIt by TechSmith however, you can create as many custom made profiles/templates as you desire. Profiles have three fields or functions that will save you valuable production time: (1) Image Styles, (2) File Format, and (3) Share Location.
--- Under Profiles, begin by selecting Image, Video or Text.
---
---
--- Under Profiles, begin by selecting Image, Video or Text.
---
---

SnagIt IMAGES
Select the "IMAGES" button and then press the "RED RECORD BUTTON" when you're ready to begin. (SC)
The crosshairs appear.
Click or drag and click over the portion you want to capture.
When you let go, your capture appears in the SnagIt Editor.
The crosshairs appear.
Click or drag and click over the portion you want to capture.
When you let go, your capture appears in the SnagIt Editor.

SnagIt TEXT

SnagIt (mp4) VIDEO & AUDIO
Select the "VIDEO" button and then press the "RED RECORD BUTTON" when you're ready to begin. (SC)
You can "SAVE" the video or image.
You can "SHARE" the video or image.
The "SHARE" button allows you to share your image or video in common destinations including "Microsoft Word".
There are two primary VIDEO destinations, (1) SCREENCAST (2) YOUTUBE
Screencast is a place to HOST your VIDEOS or IMAGES and SHARE them with others.
You can send VIDEOS directly from your SnagIt Library to your YouTube Account.

SnagIt EDITOR
OPENING THE EDITOR - By default, the editor opens automatically after you have captured an image. You can de-select this feature by clicking the "Preview and Editor" ICON buttom near the bottom of the screen. You can manually open the editor anytime you'd like by clicking on the text, "_____" in the top left hand corner of the screen.
CANVAS - The canvas is the actual image or text you captured. It's where you can edit and add "after effects".
DRAW TAB - The "Draw Tab" contains various Drawing, Annotations and Callout tools.
TOOL USAGE - Once you have selected the tool you want to use, the preset styles appear. If you don't find a preset that meets your needs, you can create your own custom made style using the Outline, Fill and Effects downdowns on the right side of the tool bar.
ANNOTATIONS TOOL USAGE -
BORDERS -
CALLOUT TOOL USAGE -
CROPPING IMAGES -
DRAWING TOOL USAGE -
EDGES -
EFFECTS TOOL USAGE -
FILL TOOL USAGE -
FILTER EFFECTS -
HOTSPOTS TAB - The Hotspots tab allows you to create clickable areas on your image. These areas can inneract with URL's making your image an inner-active experience.
OPEN CAPTURE TRAY - The open caputure is located at the bottom of the editor. This is where you'll find recently captured and open images, videos and teaxt captures. In the lower right hand corner you'll find a tool for zooming, as well as, a file folder icon. The file icon is your capture library and holds all your past captures for ease of use and organization. Click on any image in the library and use the zoom tool to increase the size to any size you desire. The image size is displayed in the lower left hand corner.
OUTLINE TOOL USAGE -
RESIZING IMAGES -
ROTATING IMAGES -
SHARING YOUR IMAGE - Click on the "Share Tab." Click on the destination you want to use. Snagit includes some destinations for you but, you can add more, like Facebook, Twitter and One Note. To add more destinations, click on the "More Accessories" icon to download more from the TechSmith website.
TAGS TAB - The Tags tab allows you to group caputures into catagories so they are easier to find in the captures library folder.
VIDEO TOOLS AND EFFECTS - If you want to use "Tools and Effects" with your SnagIt videos, you can share them with Camtasia Studio for advanced editing options.
VIEW TAB - The View Tab gives you a variety of ways to view your current and past captures.
ADDING AFTER EFFECTS - The SnagIt EDITOR is where you can fancy your image up with
(1) Borders, (2) Arrows, (3) Stamps or (4) Re-Size your image.
(1) Borders, (2) Arrows, (3) Stamps or (4) Re-Size your image.
|
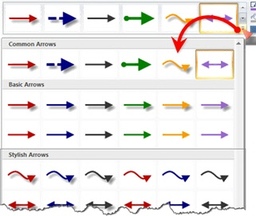
SnagIt ARROWS
|
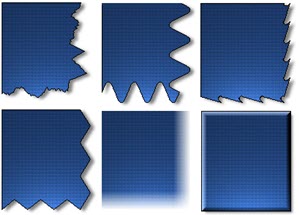
SnagIt BORDERS
|
SnagIt CALLOUTS

|
SnagIt STAMPS

|
SnagIt can edit almost any image.
You can "SAVE" or "SHARE (a/k/a Broadcast)" the video or image.
The "SHARE" button allows you to share your image or video in common destinations including "Microsoft Word".
There are two primary VIDEO destinations, (1) SCREENCAST (2) YOUTUBE
Screencast is a place to HOST your VIDEOS or IMAGES and SHARE them with others.
You can send VIDEOS directly from your SnagIt Library to your YouTube Account.

Unanswered Questions
What's in the Snagit Download Library?
Who do time saving "profiles" work?
Who do time saving "profiles" work?

TechSmith Training Videos

